How to add Read-Time to your Webflow blog
Automatically Calculate and Display Reading Time for Content Sections without using any code. Simply add in the attribute to get the full power of Javascript.
Install the VisualDX Script
Firstly, make sure you have the VisualDX script before your </body>
Add Read-time Article Attribute to Rich Text on CMS Collection Page
Copy this attribute:
Add a Rich Text to your CMS Collection page, and paste the attribute in to the Name input of the Custom Attributes.
Lorem ipsum dolor sit amet, consectetur adipiscing elit, sed do eiusmod tempor incididunt ut labore et dolore magna aliqua. Ut enim ad minim veniam, quis nostrud exercitation ullamco laboris nisi ut aliquip ex ea commodo consequat. Duis aute irure dolor in reprehenderit in voluptate velit esse cillum dolore eu fugiat nulla pariatur.
Block quote
Ordered list
- Item 1
- Item 2
- Item 3
Unordered list
- Item A
- Item B
- Item C
Bold text
Emphasis
Superscript
Subscript
Add Read-time Time Attribute on CMS Collection Page
Copy this attribute:
Add a Text Block with the text "5 min read" to your page and give the number value a span. Give the span an attribute of vdx-readtime-time
Lorem ipsum dolor sit amet, consectetur adipiscing elit, sed do eiusmod tempor incididunt ut labore et dolore magna aliqua. Ut enim ad minim veniam, quis nostrud exercitation ullamco laboris nisi ut aliquip ex ea commodo consequat. Duis aute irure dolor in reprehenderit in voluptate velit esse cillum dolore eu fugiat nulla pariatur.
Block quote
Ordered list
- Item 1
- Item 2
- Item 3
Unordered list
- Item A
- Item B
- Item C
Bold text
Emphasis
Superscript
Subscript
How to add CMS Collection Read Time to another page ie Blob Card
Add a CMS Collection List and connect to the CMS Collection you wish to count the read time
Add a Text Link or a Link Block to the CMS Collection Item. In the Text Link Settings choose the purple Collection page link option and choose Current Item
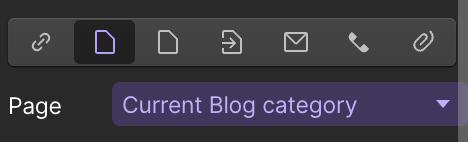
Add Read-time Link Attribute to Webflow Link
Copy this attribute:
Add a CMS Collection List and connect to the CMS Collection you wish to count the read time
Add a Text Link or a Link Block to the CMS Collection Item. In the Text Link Settings choose the purple Collection page link option and choose Current Item
Add Read-time Time Attribute to Text Span
Copy this attribute:
Add a Text Block with the text "00 Read Time" to your Collection Item and give the number value a Text Span. Paste the attribute in the Name Input of the Custom Attributes.
Publish
Demo
An example of the Readtime feature in action
How to Add JavaScript to Webflow for Beginners (No-Code Guide with VisualDX.dev)
Webflow empowers creators to design visually stunning websites without writing code. However, integrating JavaScript can elevate your site with dynamic interactions, animations, and enhanced user experiences. For beginners, the process might seem daunting, but with tools like VisualDX.dev, adding JavaScript becomes straightforward and code-free.
What Is VisualDX.dev?
VisualDX.dev is a free, attribute-based JavaScript library crafted for Webflow. It allows users to implement advanced functionalities—such as tooltips, popups, CMS sliders, and animations—by simply adding custom attributes to elements within the Webflow Designer. This approach eliminates the need for manual coding, making it ideal for those new to JavaScript.
Step-by-Step: Adding JavaScript to Webflow Using VisualDX.dev
1. Install the VisualDX Script
To utilize VisualDX features, first include its script in your Webflow project:
- Site-Wide Integration:
- Navigate to your Webflow Project Settings.
- Select the Custom Code tab.
- Paste the following script into the Footer Code section (before the closing
</body>tag): <script src="https://cdn.jsdelivr.net/npm/visualdx@1/dist/vdx.min.js?v1.1.1"></script>- Click Save Changes.
- Page-Specific Integration:
- Open the Webflow Designer.
- Access the Page Settings for the desired page.
- Paste the script into the Before tag section under Custom Code.
- Click Save.
Note: Adding scripts before the closing </body> tag ensures that the page content loads before the JavaScript executes, enhancing performance.
2. Add VisualDX Attributes to Elements
With the script in place, you can now enhance elements by adding specific attributes:
- Tooltips: Add
vdx-tooltip-top="Your tooltip text"to an element to display a tooltip on hover. - Popups: Use attributes like
vdx-popup="popup-id"to trigger modals. - CMS Sliders: Implement sliders by adding
vdx-cms-sliderto your CMS collection list.
For a comprehensive list of attributes and functionalities, refer to the VisualDX Quick Start Guide.
3. Publish and Test Your Site
After adding the script and attributes:
- Click Publish in Webflow to apply changes.
- Open your site in a browser to test the new functionalities.
- Use browser developer tools to inspect elements and ensure scripts are functioning as intended.
Tips for Beginners
- Start Small: Begin with simple features like tooltips or popups to familiarize yourself with VisualDX.
- Use Webflow's Preview Mode: Test changes in Webflow's preview before publishing.
- Refer to Documentation: VisualDX offers detailed documentation to guide you through various implementations.
Final Thoughts
Integrating JavaScript into your Webflow projects doesn't have to be intimidating. With VisualDX.dev, you can enhance your website's interactivity and user experience without writing a single line of code. This approach is perfect for beginners looking to add dynamic features efficiently and effectively.
For a visual walkthrough on using VisualDX with Webflow, check out the following tutorial:
How to use VisualDX for your Webflow sites